Friday, May 31, 2019

ISO Art Print Found!

Oh my goodness, I've been dreaming of finding a reasonably priced Vernon Ward, "Enchanted Everglade" for 3 years now. Finally, I did!! Yippee! While doing my usual searches online, one of my fellow collector friends and Etsy shop owner, Rebeccaheartsvintage, listed that very art print in her shop! She's sold a few before, and this one was just as beautiful as the others she's found. I immediately, made the purchase and she shipped it out and I received it the other day. It was beautifully wrapped in tissue paper and I just had to take a quick pic before opening it completely.

 Inside, the white with gold trim frame is just lovely and reminiscent of kitsch. The artwork is beautiful, with its delicate colors of pinks, blues, browns, yellows and white. A Mother with her baby fawns, look towards you as if to say, "You found us!" As the early morning sun rises behind them in the forest.... "Enchanted Glade", is one of two of Vernon W. kitsch art prints called by collectors as, "Woodland" prints, I believe. This one is my favorite that were mass produced around the 1960s. The other has the Doe laying down with her baby fawn. Vernon W. has many other art prints of swans, flowers, and scenic landscapes, etc. But, the 'Woodland' prints, I believe are just dreamy for those of us that collect nursery kitsch. To find them in the UK is a lot more easy, then for us in the States. So, shipping them can be very costly, but so worth it. Definitely an awesome purchase from Rebecca! Thank you dear so much.

 I also received this lovely Lot of two Posedolls via Yahoo Japan. I will list the doll on the left and try to clean up the doll on the right. Just one of a few projects in the works. I also, received some yummy plastic lemon slices in different colors, and pastel beads for another project I need to work on! More on them later...

 It's been a busy beginning to the summer. Hope you all are enjoying your week?!

Thank you for looking! ~ ggsdolls

Sunday, May 26, 2019

Pearl Doll N Rushton!

I've been wanting to buy one of these lovely vintage Japanese dolls that look like pearls. I did some research and found out they are called, "Pearl Dolls". You can see why...
I've tried to find more information on them in English, but sadly there was none except, on Kokeshi dolls. These dolls are similar to Kokeshi, but pearl-like and to me, a bit more fancy. Perhaps made around the 1940s or 50s in Occupied Japan at the time. This particular Pearl doll is lovely with her polka dotted pink gown, and ruffles along her shoulders and hem. She is very light in weight and stands about 7 1/2 inches tall. The translation for the Kanji at the base, "山金" says, "Mountain" "Gold". I couldn't find out the symbol in the center. But, perhaps a saying or wish, meaning, "May you find a mountain of gold" or "May you always have money" is another. I know, that many cultures including ours here on Guam, have statues, posedolls or trinkets, that we display in hopes they will bring us, "Good Luck" so to speak. So, perhaps these Pearl dolls are like that of a symbol of "Good Luck" or well wishes for display. Still a lovely piece of vintage history nonetheless.

 I also found this cutie via Ebay. He was listed with a "Buy it Now" price and so I adopted him. I already have a sweet sad face bear, but this cutie is a Rushton and his color is just lovely also. So, he will live with me for a bit. I washed him and he was actually in pretty good condition, with original tag. About 9 inches tall.


 Yesterday, Sara and I headed uptown just to get out of the house. We stopped by to gas the car and I found this Japanese UHA Puccho Stick Soda Chew candy. I thought it was gum at first, but inside, is a chewy candy that has bursts of soda granules inside. It was quite yummy actually, especially if you like soda. Interesting flavor too, like blue berry. I also, finally put some cute animal stickers on my blue set of Sterilite shakers. Now, here they are in my cabinet along with my star and heart jars from our local Daiso.


 Last, I bought four packs of the Kabaya Jewel Box candy w toy at the grocery store. Because, I got a set in the mail, that was the wrong set, mistake by the seller. I decided that it was cheaper to just buy them from the store. Sadly, with Kabaya Jewel Box, the items you see on the box, is very random, not like some sets you can buy the whole set and you know you will get one of each shown on the box. But with this one, they have 2 styles of each and in a set of 12, you could get any of the random styles, sometimes they have three of the same in one set! Ugh. Not, something I will buy again, knowing that I won't get one of each. But however, from the four I purchased, you can see above, I got three out of the four in different styles, and I even got the hair tie I wanted in the first place, the pink unicorn hair tie!! Yesss! I actually wanted just the hair ties and the bunny necklaces. Oh well, I will try my luck next time. Each box is cheaper then me buying it directly from Japan. Ha!

Thank you for visiting! ~ ggsdolls

Friday, May 24, 2019

Pastel Colored Finds...

I found a few cuties in pastel colors, that I could not resist getting. Here they are...
 First, this cute blue and yellow plush 1950s or possibly a 1940s, bunny. I've seen a few other collectors with these types of bunnies in lovely pinks, yellows, and blues. The one I find myself drawn too, are the googly pink eyed ones. This one I found through etsy. They have wire in their ears you can use to pose. Mine has no, pompom nose, and they can vary in sizes, from 9 inches to 20 inches tall, including ears. Sometimes they have fabric ears in different patterns or satin. Very shabby chic if you ask me. So, I did, I caved and got one. He just looks very grumpy though. I would not recommend washing them. They often have either foam or sawdust for stuffing. Besides the fact, that they are made in the 1940s, I think, their fur and fabric may not withstand the wash. So, instead I used wipes to sanitize him.


  I also, found a Lot of pastel faux pearl beads via ebay. I have plans to use these in those heart jars or perhaps some other crafting ideas. I just love their pastel colors. Next, I found this cute vintage carnival plush blue poodle also on ebay. Her eyes were what caught my attention. So snooty if you ask me! Ha! She is also filled with foam. Her box arrived crushed, and I was worried she didn't make it either. But upon inspection, it was just her backside that needed a bit of reforming. So, I gently squeezed, poked and pushed her foam back in place. I will also just wipe her down. She is actually quite minty for her age.


 I recently traded my cute bear mirror by Swimmer, for these awesome Fawn prints by Boopsidaisy on Etsy!! I've been wanting a large print for some time. Now, I got two of her prints one in blue and one in pink. Now, to find some frames for them! Missy even added so many other cute stickers and smaller prints, etc. to gift me!!

 She sent me these awesome smaller prints of her amazing Pop Art, she included two badges, she even made me two special sets of kewpie bunny stickers below!!! Now, to find spots in my room to stick them onto!! Yesss! Thank you dear Missy for all these awesome goodies!!

Have a wonderful weekend fellow collectors!

Thank you for reading! ~ ggsdolls

Wednesday, May 22, 2019

Making Candy Leis!

It's that time of the school year here on Guam! So, my youngest Sara is going to be promoted to 6th grade next year and this year at the end of 5th grade, she is having her Promotional Ceremony. So, I decided not only to make her a money lei, but also a candy lei. It's actually not that hard to do.

Here's what you will need:

- Assorted Candies, chocolate, gum, etc. For Sara, I got one bag of flavored gummies individually wrapped, 20 pcs of Japanese flavored bubble gum, and 10 pieces of bubble gum with tongue tattoos. You can use other candies of your choosing, these are just her favorites. Though gum is not allowed in school.

- A box of Clear Saran Wrap. You can also get colored Saran or even use a roll of cellophane. I prefer Saran, because it easily sticks together.

- Colored plastic ribbon, one roll.

- Scissors, and a book with a bit of weight.

First, you can sort out the candies that you will use to make into a Lei. What I've done, was take about five pieces of each set of candies or gum I had to equal about 14 pieces total. Then, you can arrange them in a random order or you can use a pattern, when placing them onto the Saran. You will understand this a bit later on. Set aside for now.

Second, pull the Sara Wrap out of the box and allow to lay flat across a long counter. In my case, I used the length of my bed by width. Measure the length of the Saran to be about 55 inches long. Tear off and lay flat. You can use the book to hold down the Saran, while you arrange the candies. I place the candy and gum down in a pattern along a line with at least 1/2 inch separation between each piece.
 Third, carefully fold the saran over the candies, all the way to the other end, and repeat. When you've completely folded the saran and candies to the last of the open saran, you are just about done. After the folding, you can carefully press the saran around each of the candies, and even the empty sections to seal them. This also makes sure that each of the candy or gum is wrapped securely.

 Fourth, you will take the plastic ribbon and cut them in sections of 7 inches in length. You will need about 14 to 16 pieces. On each separated section of the lei, you will double knot the ribbon. This is more for decorative purposes and you can use different colored ribbon or even color coordinate with school or your loved one's favorite colors.

 Fifth and final step, at the end of the lei you will still add the ribbon. Now, you need to double tie the saran onto itself at the end of the necklace. For added security, I double tie the ribbon as well. Now, it will look sort of sloppy with the plastic ribbon just straight. So, what you will do next is take your scissors, and hold one edge of the Scissor's blade, be careful not to press your thumb onto the blade itself. I hold it at the side as you can see in the photo below. You will curl the ribbon, by placing the ribbon between the blade and your thumb and slowly, but carefully, allow the blade to glide along the plastic ribbon, with your thumb pressing. This will cause the ribbon curl up.

The candy lei turned out lovely! I made a few more for her friends too. It's just a simple gesture to say thank you from Sara. I hope Sara likes hers too?!
I also, got just a few things in...
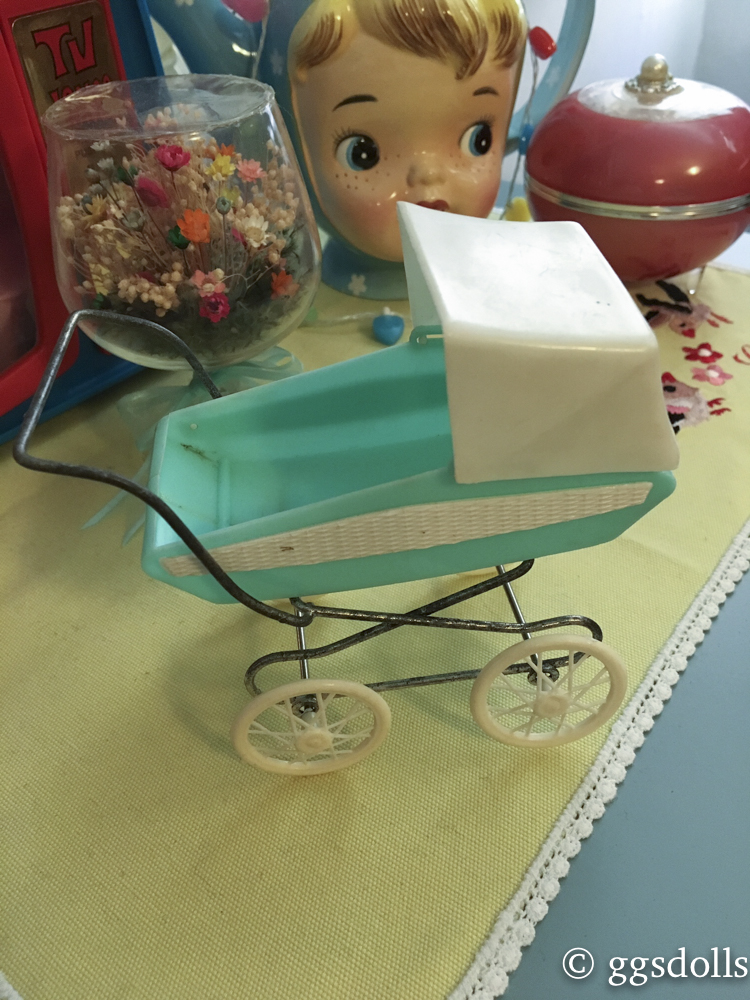
 A lot of five vintage Candy House Cake toppers. I plan on repainting them and adding some things too them. More later. I also stopped by the Goody Store the past weekend and pick up more things. Like a music note fabric, Milky candies, Pink and white marshmallow hearts, a jewel box and even a heart jar!! This cute vintage German dollhouse stroller also came in. It is in 1/12 scale and I've been wanting one for ages. I can't wait to add a little baby doll inside!!


 The wheels roll and the top of the pram also shifts. This is about 1960s, I believe, possibly Modella? I will have to check. Still pretty cool and small too!

 I do hope the candy lei tutorial helps you be creative for your special little one or anyone! Have fun and thank you so much for visiting!! ~ ggsdolls